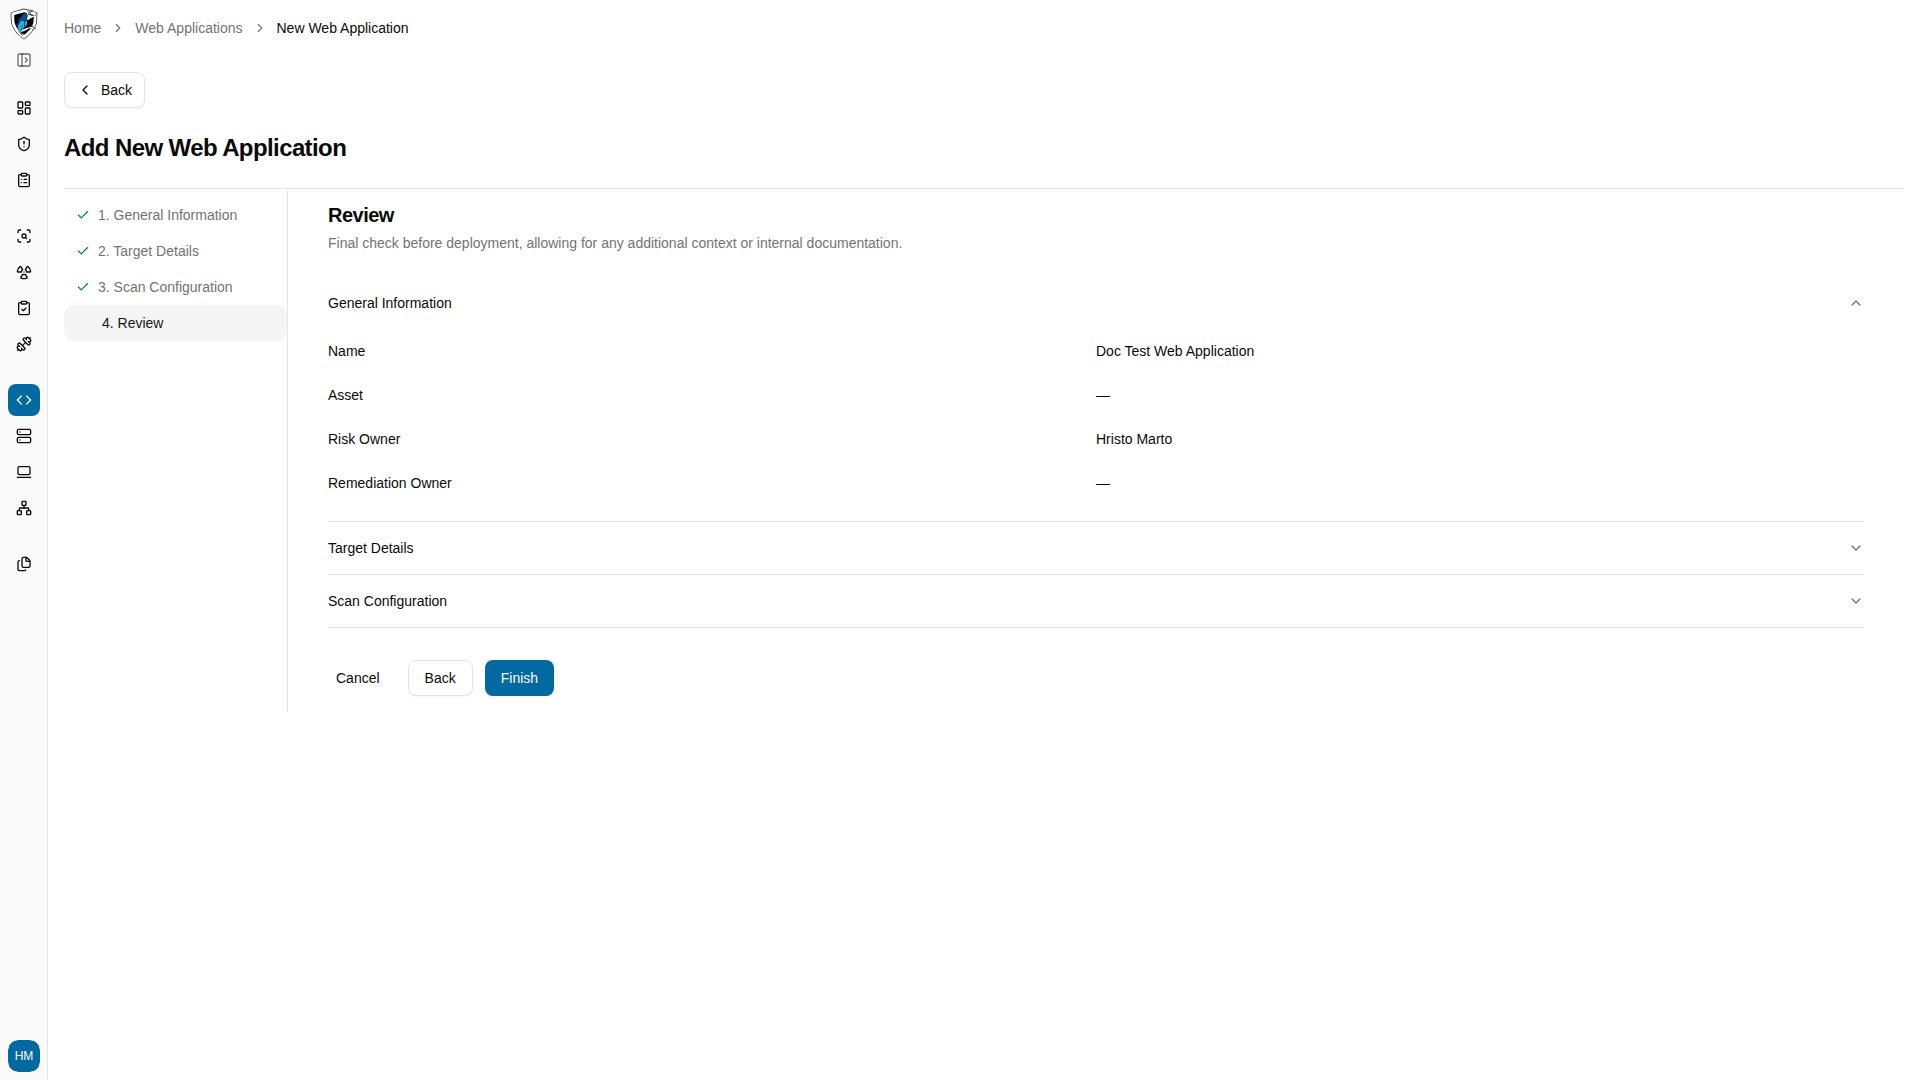

/web-applications/new takes four steps.
Completed steps stay clickable in the progress bar at the top, so you can jump back to an earlier step without losing what you have entered.
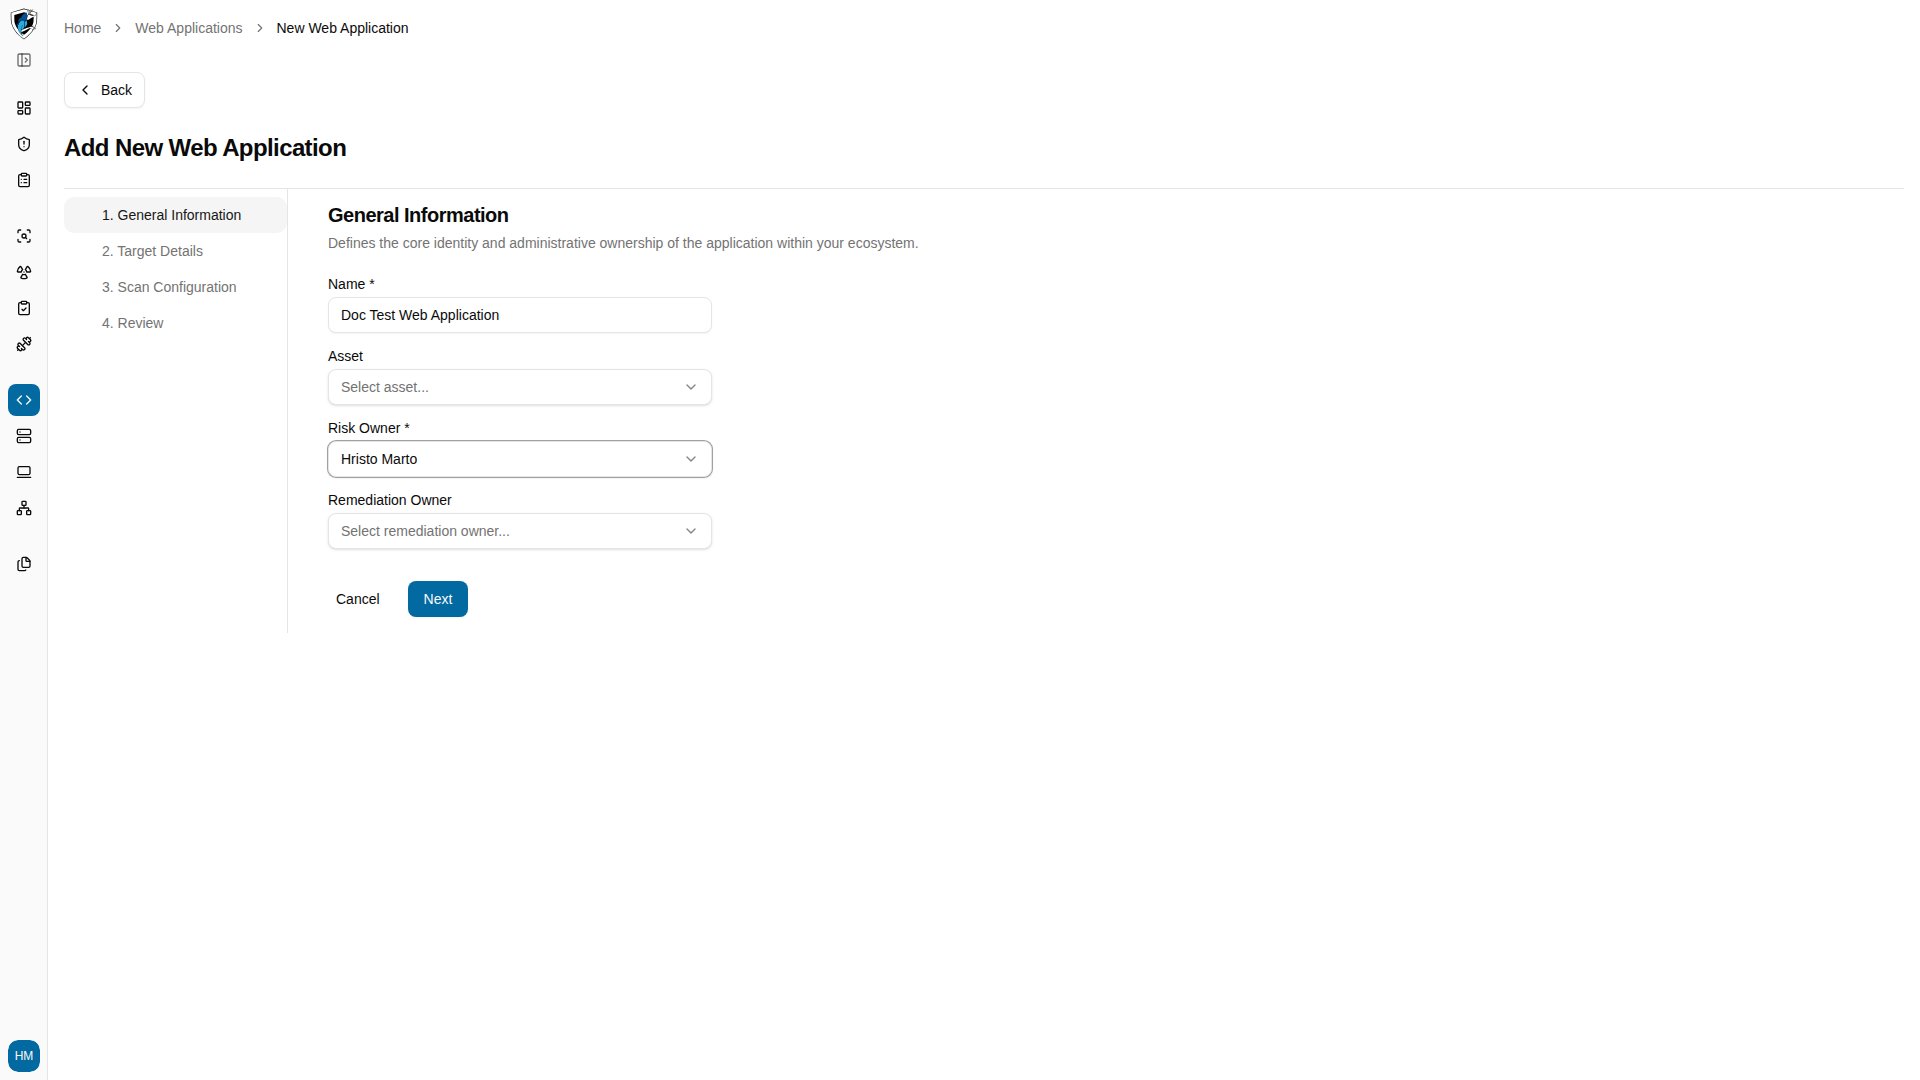
Step 1: General information
- Go to
/web-applicationsand click Add new. - Fill in the fields:
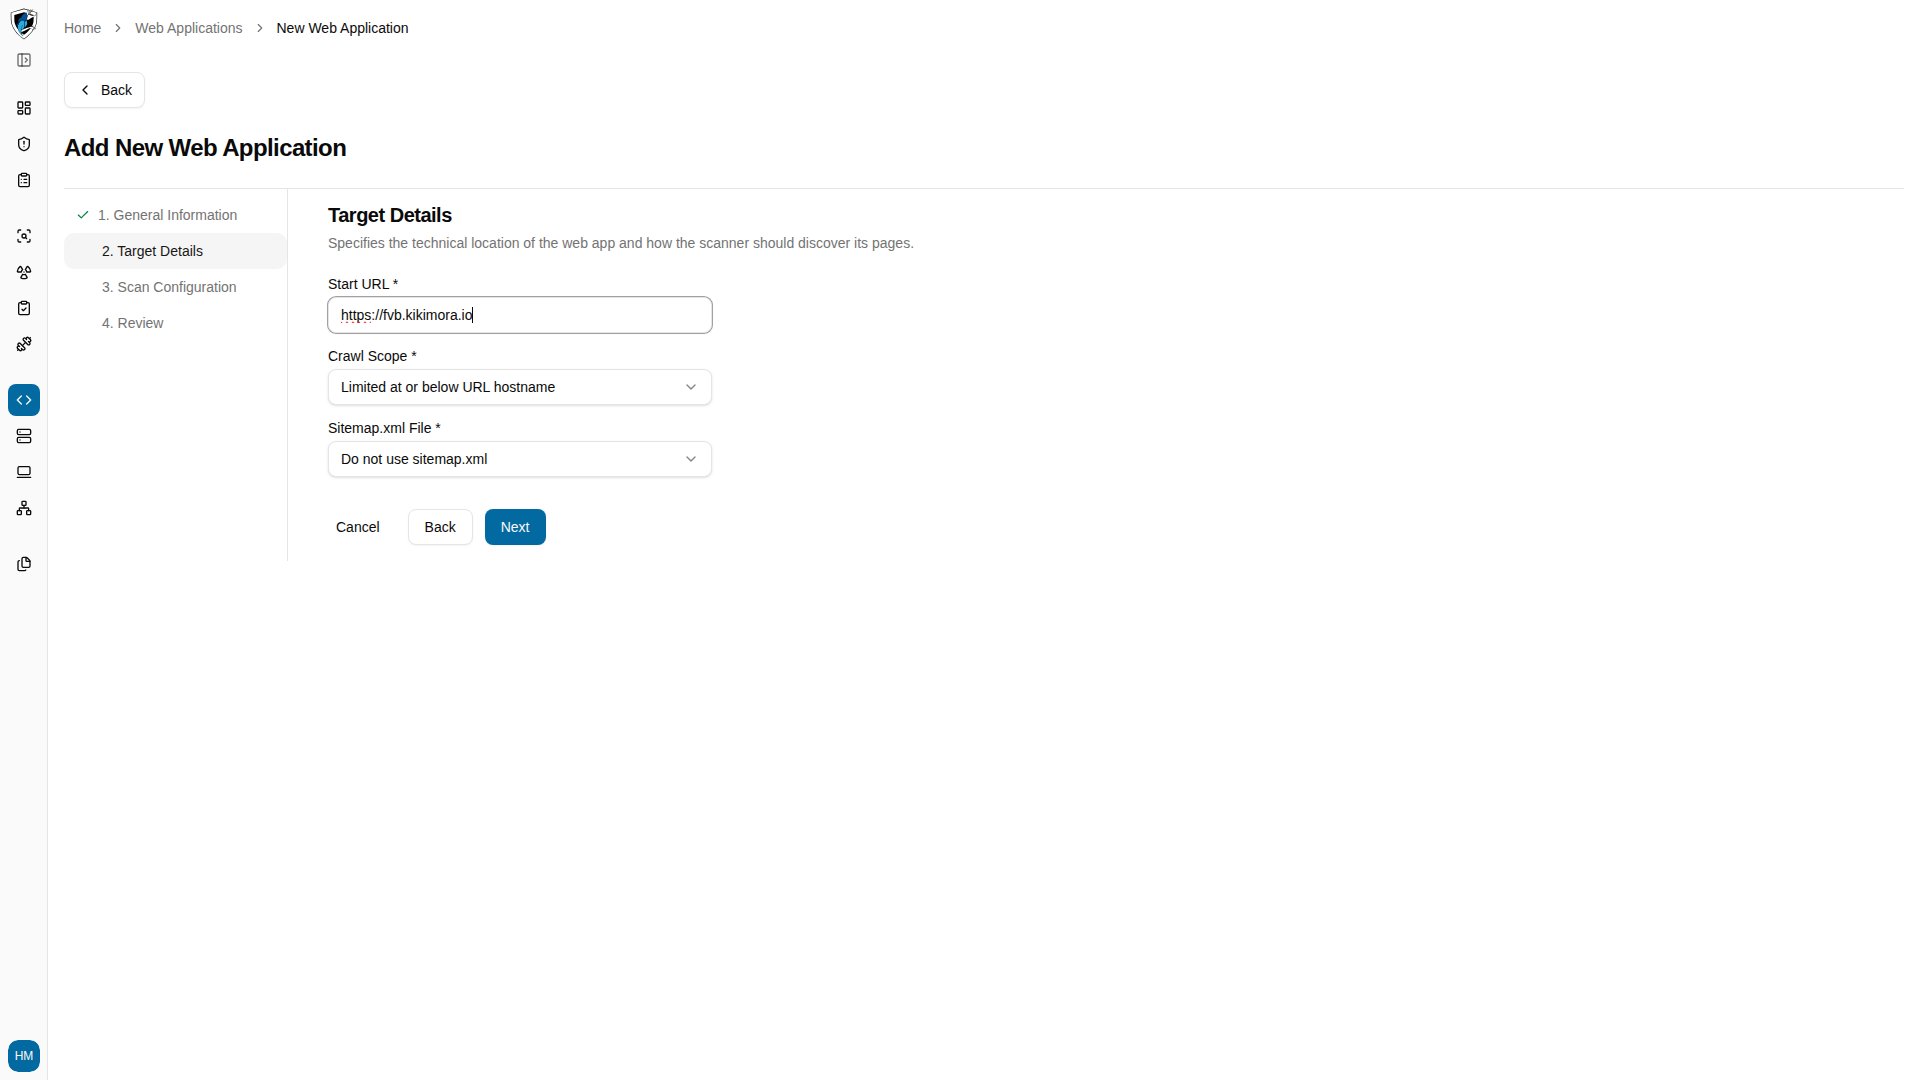
Step 2: Target details
Click Next, then configure how the scanner reaches and crawls the application:
If the start URL points at an unverified domain, a domain verification dialog prompts you to prove ownership before continuing.
Step 3: Scan configuration
Click Next to reach scan configuration: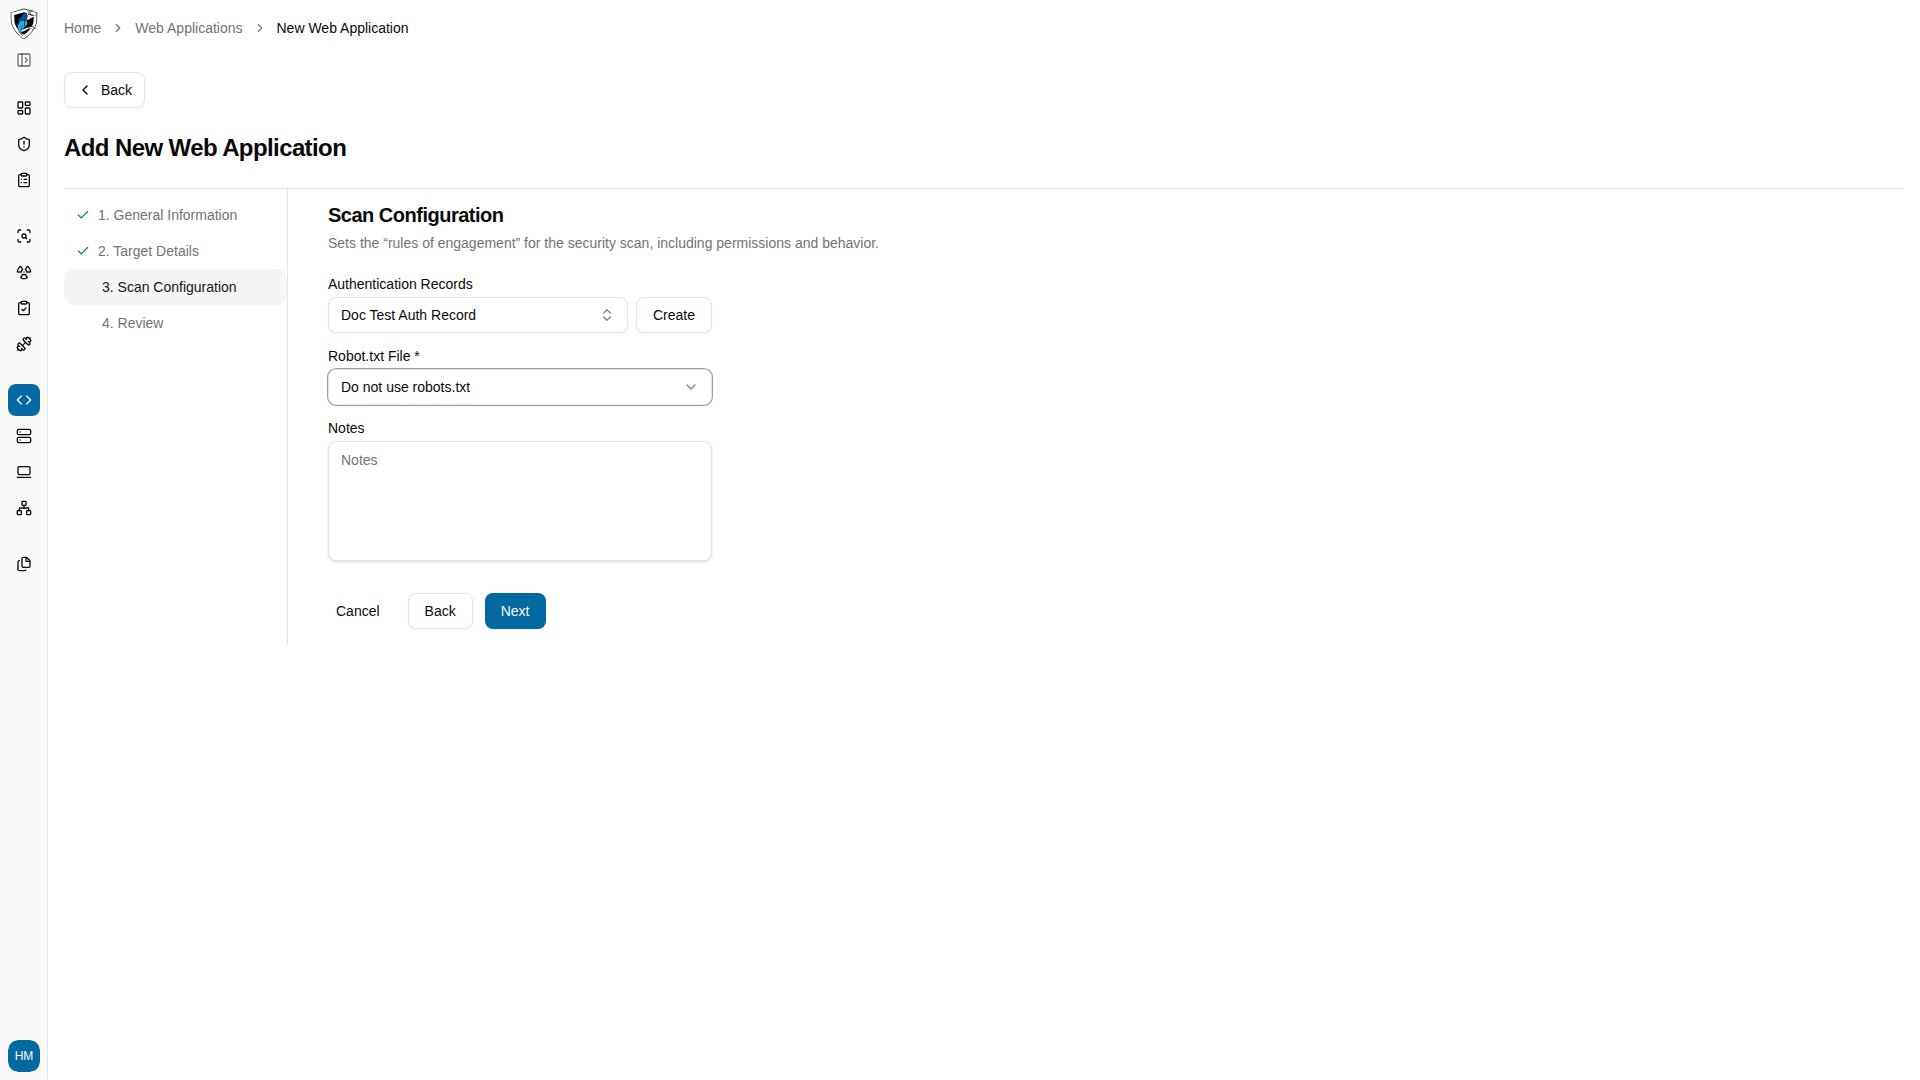
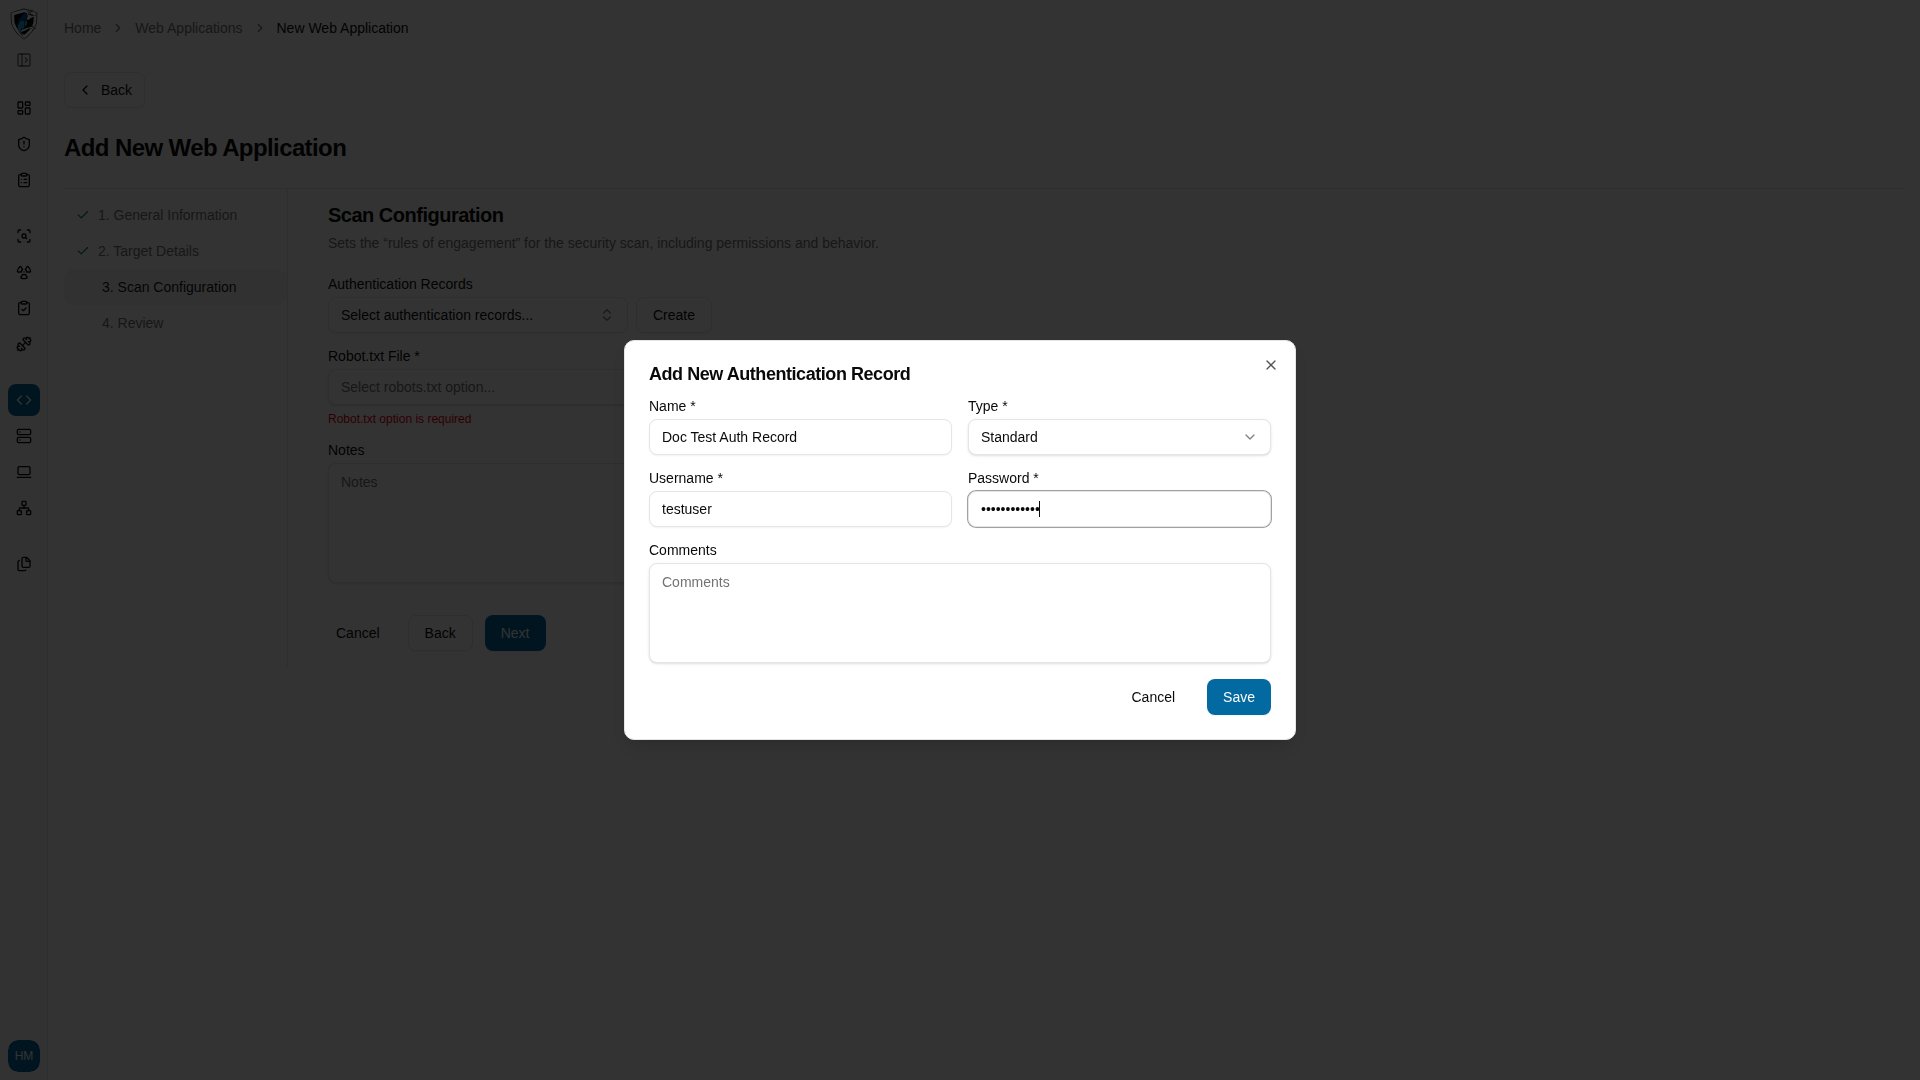
Creating an auth record inline
Clicking Create in the Authentication Records section opens the Add New Authentication Record dialog:- Name (required) — identifies the credential set. Empty submit returns
Name is required. - Type (required) — the authentication method, such as Standard, Selenium Script, or Header Authentication. Empty submit returns
Type is required. - Username and Password — required when Standard is selected.
Step 4: Review
Check the summary across General Information, Target Details, and Scan Configuration, then click Finish to save and provision the web application.