> ## Documentation Index
> Fetch the complete documentation index at: https://docs.kikimora.io/llms.txt
> Use this file to discover all available pages before exploring further.
# Creating a scheduled scan
> Walk through the three-step Launch New Scan wizard, covering general information, schedule and recurrence options, and the review summary.
Creating a scheduled scan takes three steps in the **Launch New Scan** wizard: general information, schedule, and review.
Before you start, make sure the target **web application** and, for authenticated scanning, the **auth record** already exist.
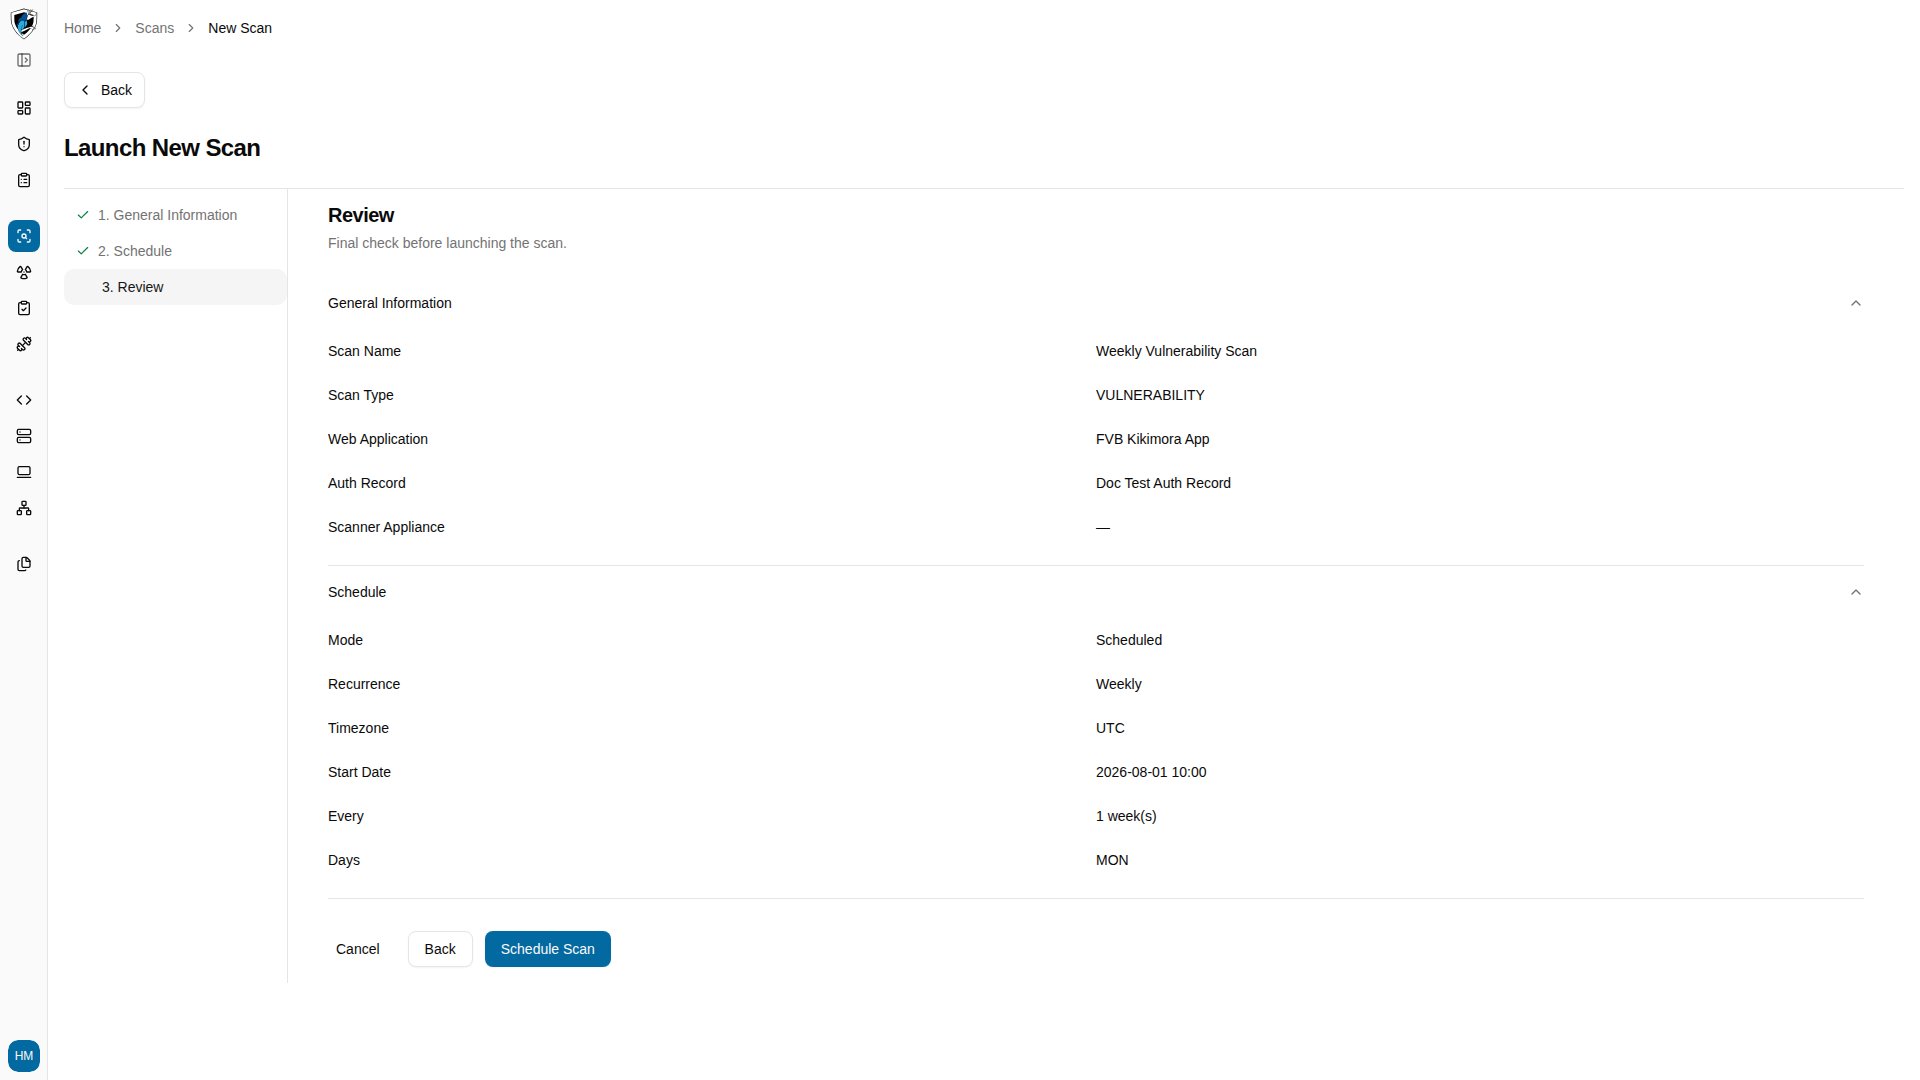
## Step 1: General information
1. Click **New Scan** on the Scans list page.
2. Enter a **Scan Name**, such as `Weekly Vulnerability Scan`.
3. Select `Vulnerability` from the **Scan Type** dropdown.
4. Select the target under **Web Application**, such as `FVB Kikimora App`.
5. Select an **Auth Record** to scan as an authenticated user, such as `Doc Test Auth Record`.
6. Click **Next**.
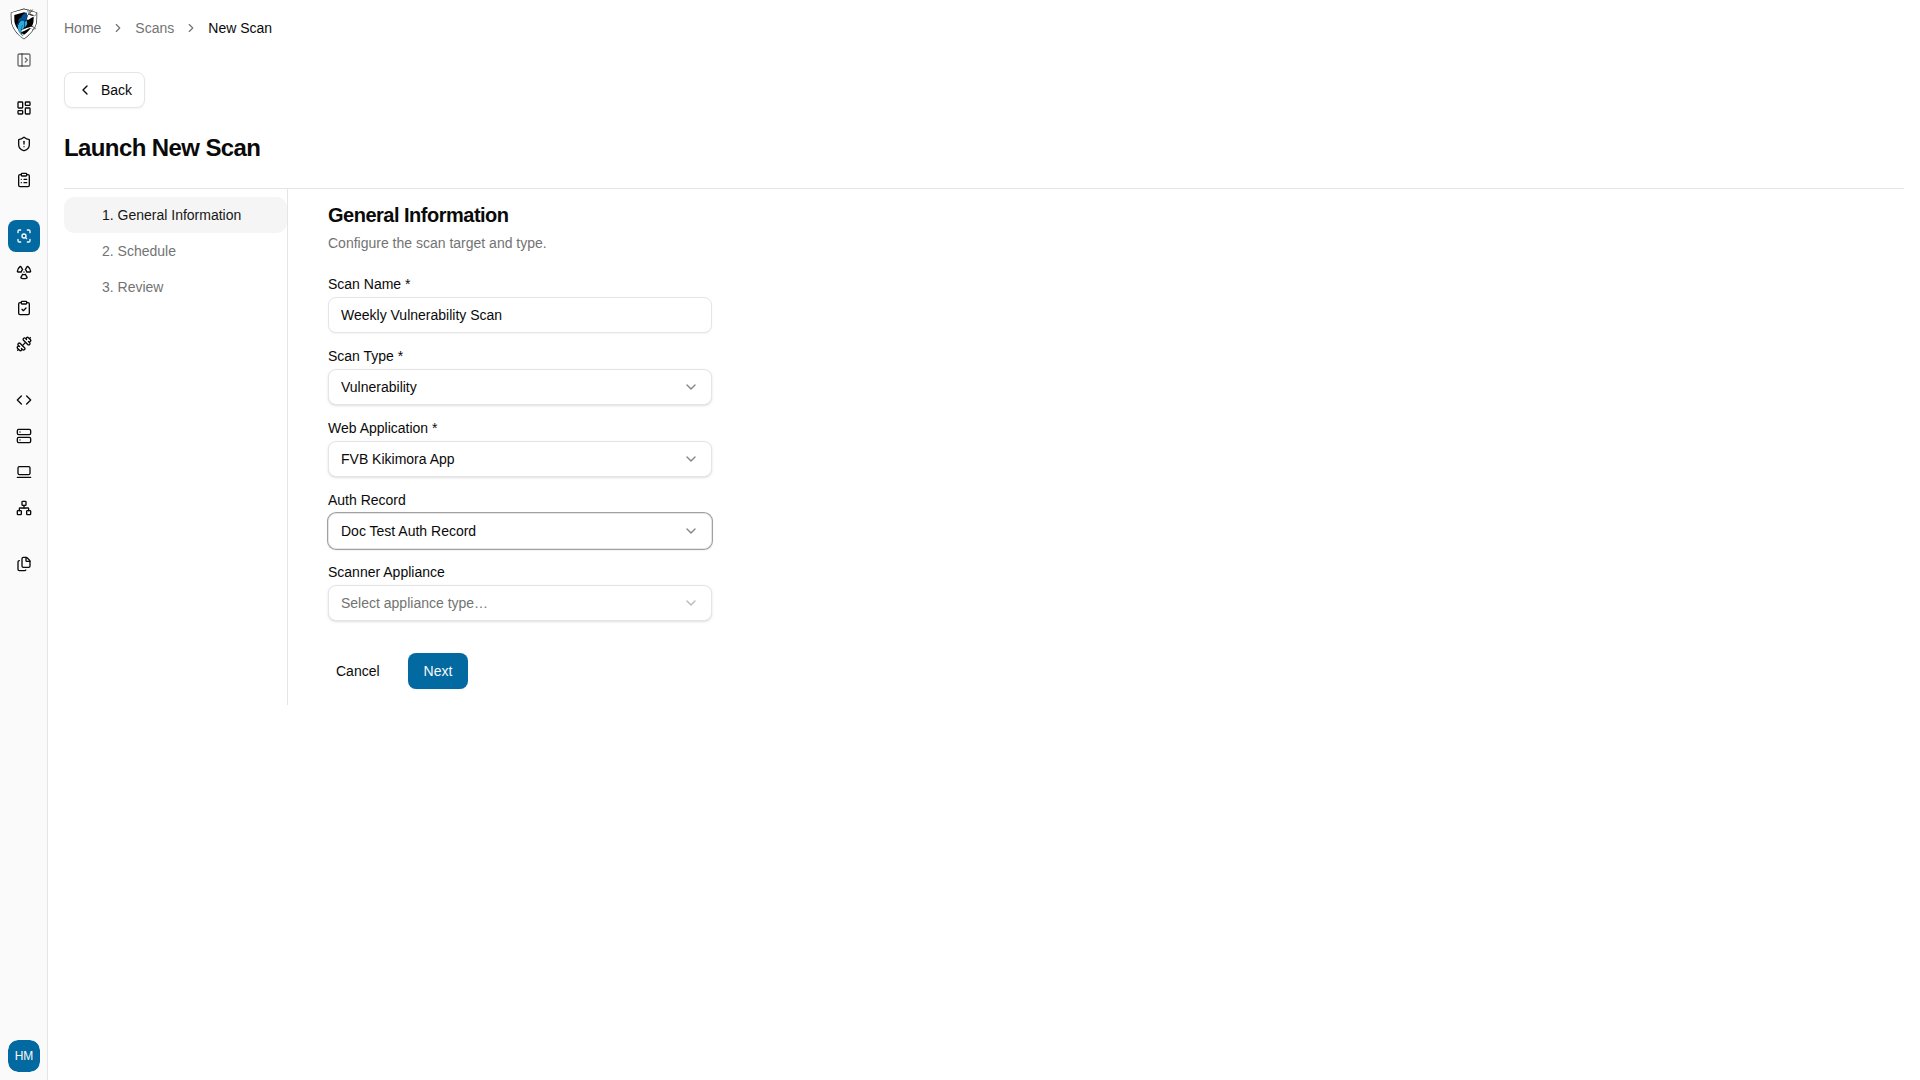 ## Step 2: Schedule
Step 2 controls when the scan runs and how often it repeats.
**Scan timing**
* **Run Now** triggers a single immediate execution.
* **Schedule** defers the scan and opens the recurrence options.
**Recurrence**
* **Once** — a single execution at a future date and time.
* **Daily** — repeats every day at the configured start time.
* **Weekly** — repeats on selected days of the week, such as `MON`.
* **Monthly** — repeats on specified days of the month.
**Start Date / Time** sets the first execution, for example `2026-08-01 10:00`.
To schedule a weekly scan:
1. Select **Schedule**.
2. Set **Recurrence** to `Weekly`.
3. Select the day to run on, such as `MON`.
4. Set the **Start Date**.
5. Click **Next**.
## Step 2: Schedule
Step 2 controls when the scan runs and how often it repeats.
**Scan timing**
* **Run Now** triggers a single immediate execution.
* **Schedule** defers the scan and opens the recurrence options.
**Recurrence**
* **Once** — a single execution at a future date and time.
* **Daily** — repeats every day at the configured start time.
* **Weekly** — repeats on selected days of the week, such as `MON`.
* **Monthly** — repeats on specified days of the month.
**Start Date / Time** sets the first execution, for example `2026-08-01 10:00`.
To schedule a weekly scan:
1. Select **Schedule**.
2. Set **Recurrence** to `Weekly`.
3. Select the day to run on, such as `MON`.
4. Set the **Start Date**.
5. Click **Next**.
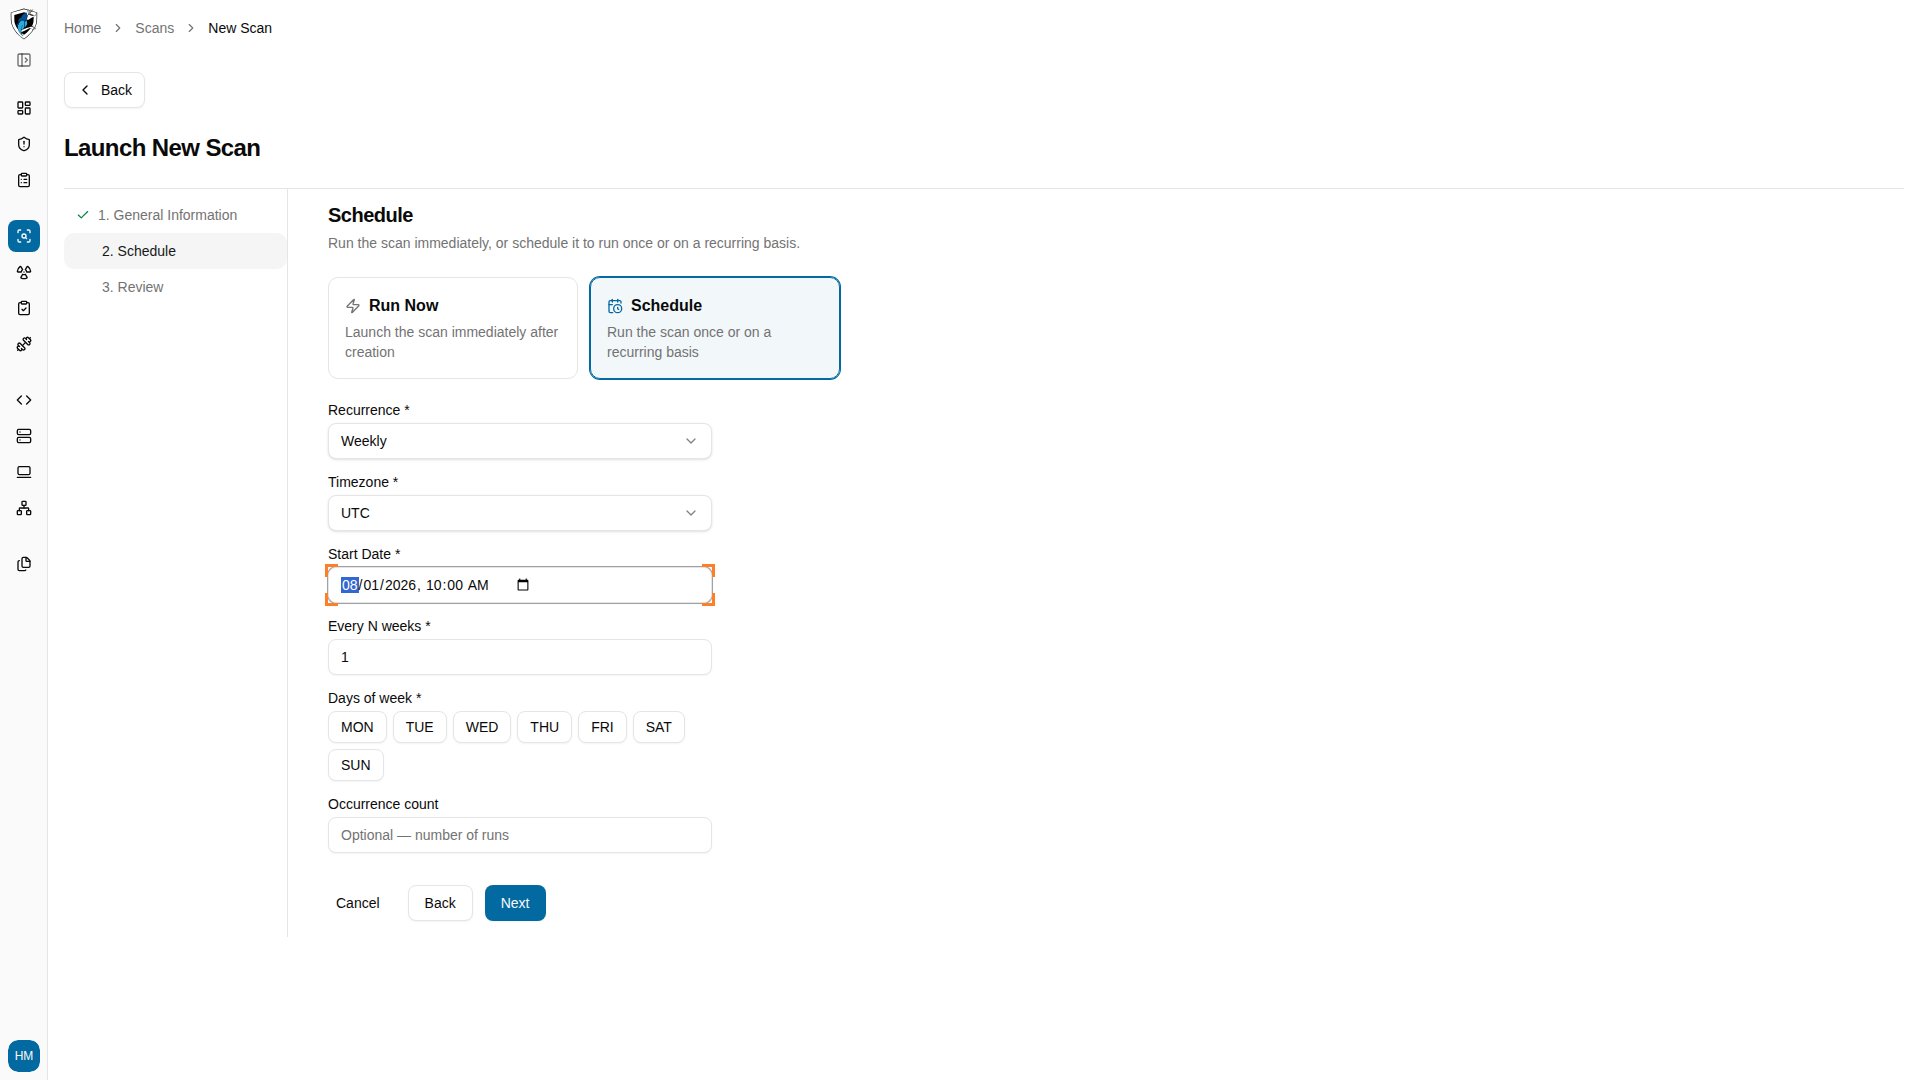 ## Step 3: Review
Step 3 is the final check before launching. It summarizes everything you configured:
* **General Information** — Scan Name, Scan Type, Web Application, Auth Record, and Scanner Appliance.
* **Schedule** — Mode, Recurrence, Timezone, Start Date, Every, and Days.
Confirm the details, then click **Schedule Scan** to create the scheduled scan. **Back** returns to the schedule step, and **Cancel** exits the wizard without saving.
## Step 3: Review
Step 3 is the final check before launching. It summarizes everything you configured:
* **General Information** — Scan Name, Scan Type, Web Application, Auth Record, and Scanner Appliance.
* **Schedule** — Mode, Recurrence, Timezone, Start Date, Every, and Days.
Confirm the details, then click **Schedule Scan** to create the scheduled scan. **Back** returns to the schedule step, and **Cancel** exits the wizard without saving.